Ok so here is the write up to swap a GM altenator onto a Toyota 4cyl (22RE, 22R) using a Trail Gear style altenator bracket.
Trail Gear Alenator Bracket:
www.trail-gear.ca/default.cfm?fa=products&ProdCategoryID=185Installation instructions can also be found on their site.
Use this site to choose which altenator you want to run, and it also Tells you which vehicles they are availiable in. Extremely helpful:
www.extreme4wheelin.com/tech/alternators/tech.htmI believe any altenator on this page will fit in the Trail Gear bracket. As long as it has the 12 o'clock and 6 o'clock mounting ears.
Here are some sites just for your reading pleasure. They helped me with the swap:
www.yotatech.com/f2/cs-144-alternator-install-209649/www.yotatech.com/f131/gm-cs144-140-amp-alternator-swap-3-0-a-118482/List of supplies needed:
- GM altenator of your choice
- (2) GM altenator plugs
- GM single groove pulley
- Trail Gear or similar altenator bracket
- ~5' of 8 guage wire
I would set a day a side to do the swap. Just in case any problems arise. But it took me about 4hrs after i had researched everything.
I chose to use the CS144 because it has the highest power output (~140amps) where as ~100amps are availiable at idle. The stock Toyota 22RE altenator puts out ~60amps. The CS144 is a tight fit, but it does fit! If you do not need the high power output i would suggest using a CS130 (~100amps). The CS 130 case is quite a bit smaller than the CS144. The CS144 can also be modified for even higher power outputs!
I pulled mine out of a 1995 Cadillac Fleetwood 5.7L at a local Pic N Pull for 30$ CDN.
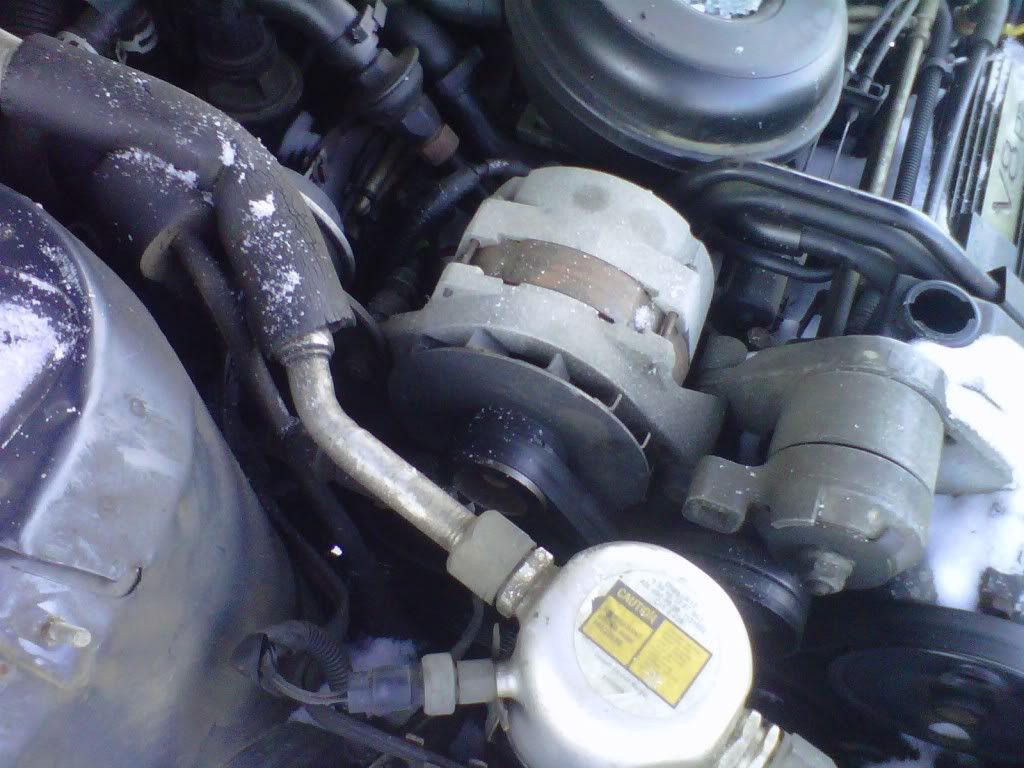
Fairly easy to get out of the car. Only basic tools are needed.
However shortly after i burnt out the altenator. I put it thru a full test with all my lights and heavy winching. Kind of expected from a who-knows how-old altenator. Since installing the remanufactured altenator from NAPA i have not had any problems.
I then went and purchased one from a local NAPA store for ~ 170$ CDN (not incl. core)
You can see the difference between the two:
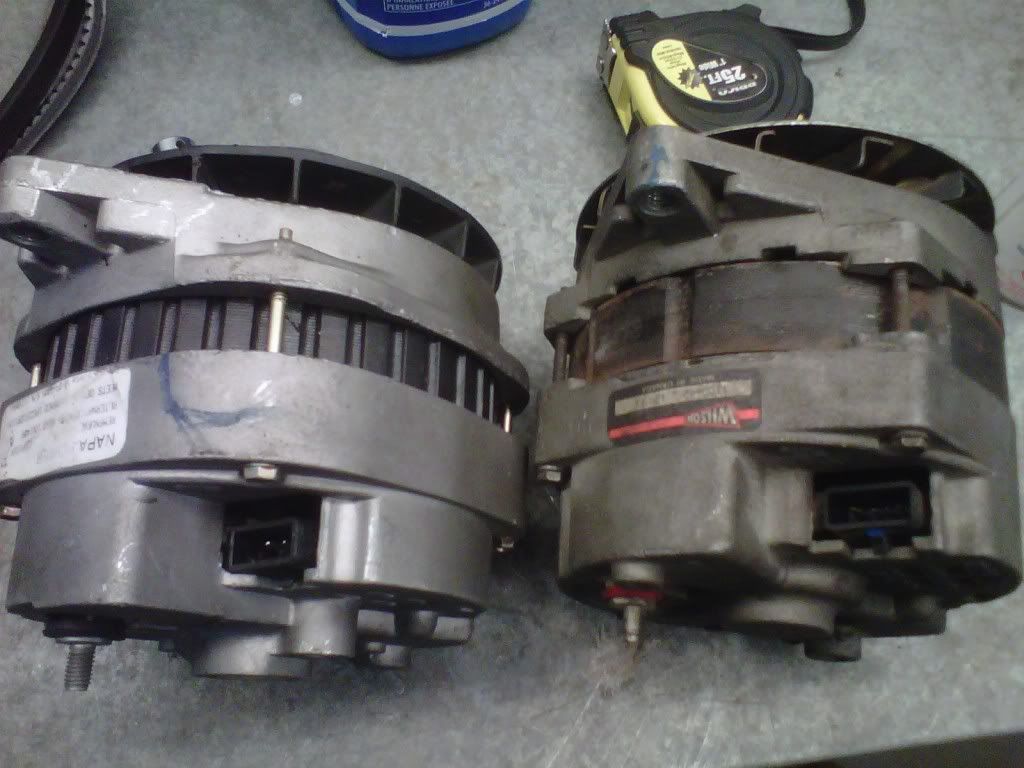
Some modifications are needed, also had to 're-clock' 90':
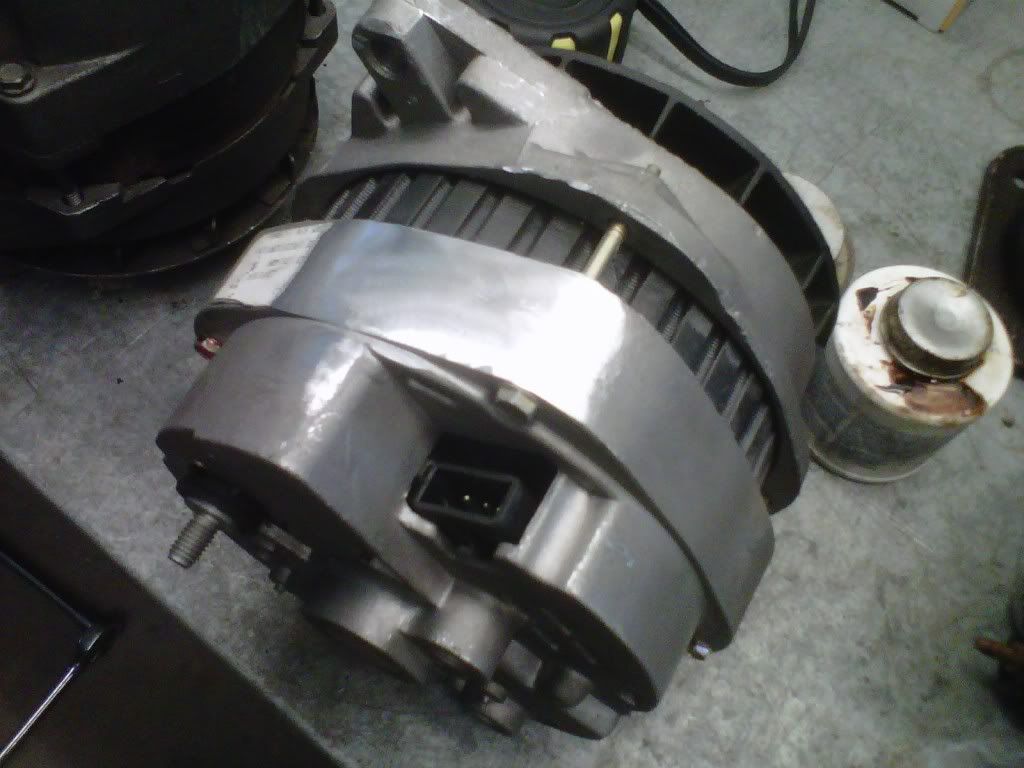
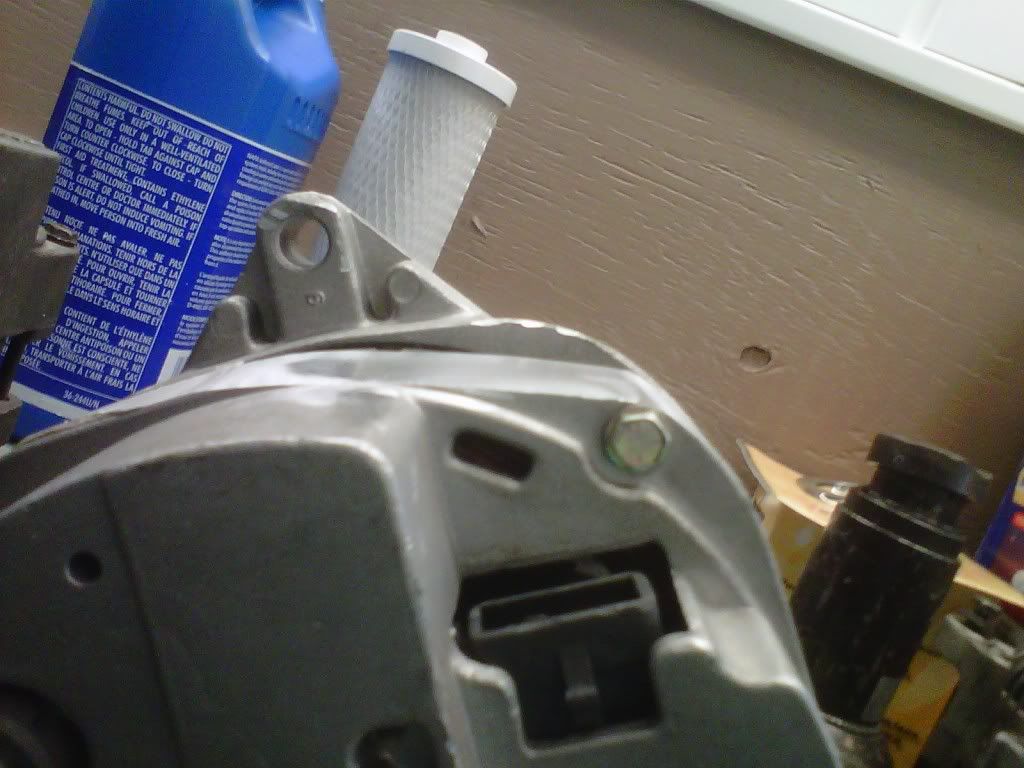
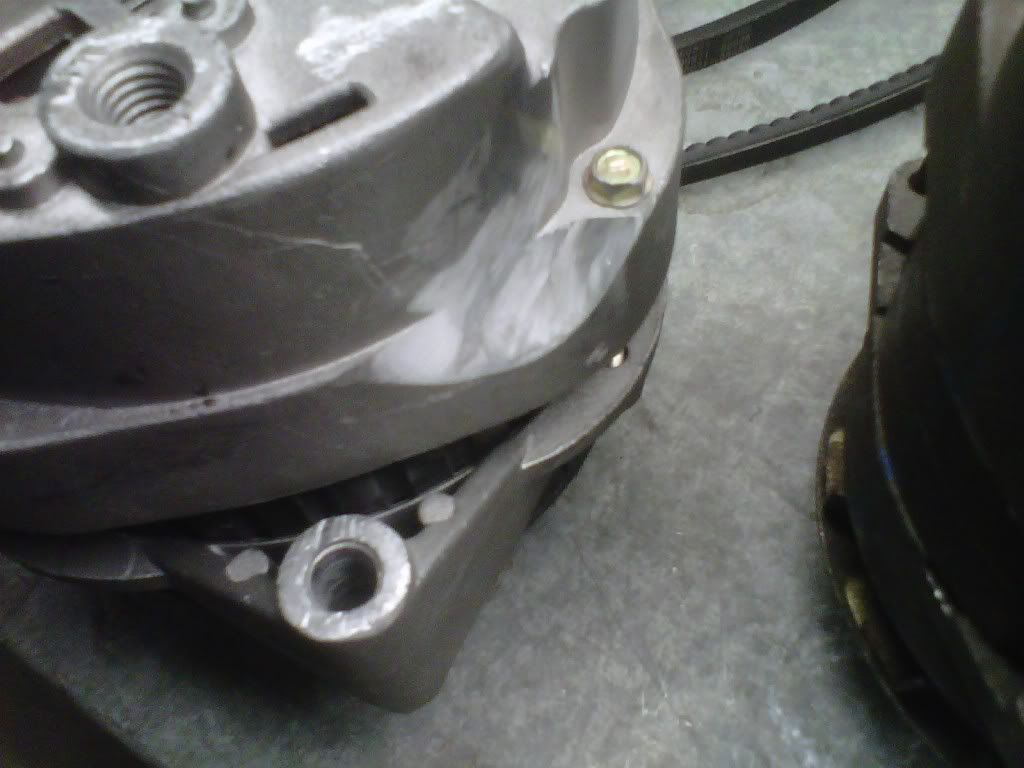
These are some pictures of a CS144 installed on a 'pulled' engine for 'mock up':


1) Disconnect negative battery cable
2) Drain coolant from peacock valve on lower passenger side of radiator.
3) Remove lower radiator hose
4) Remove air box and intake tube that is leading to upper intake Plenum. Dont forget to disconnect your MAF sensor.
5) If installing the CS144 fan shroud and upper rad hose needs to be removed. I do not believe you need to complete this step if installing the CS130 or smaller.
6) Loosen power steering belt tensioner and remove belt.
7) Loosen altenator tensioner bolt and remove belt. Now would be a good time to replace both belts if needed!
8) Unplug altenator plug and remove main power wire.
9) Remove stock Toyota altenator from the bottom where the lower rad hose used to be.
10) Support engine and remove (4) bolts holding stock altenator bracket on. Keep in mind (2) of these bolts are holding the engine mount and engine may shift if not properly supported.
11) There are (3) bolts holding the power steering belt tensioner. Remove the (2) on the passenger side and loosten the 3rd. You can now flip up the tensioner and have access to the hidden boolt for the altenator tensioner bracket.


12) Remove stock tensioner bracket.
13) My Trail Gear bracket slot wasnt wide enough for the bolt. A die grinder fixed that quickly.

14) Install Trail Gear Tensioner bracket
15) Install Trail Gear Altenator bracket

16) The CS144 comes with a serpentine belt pulley.

It must be swapped for a single groove. Pulleys are interchangeable from 10SI thru CS144. Use an air impact to loosten pulley nut.

Be sure to shim pulley as necessary to get the belt in-line with engine pulleys. I put my pulley flush against the external altenator fan.

17) Install GM Altenator. If installing the CS144, it is a very tight squeeze to get it in! You can do it just have alot of patience.

Stock altenator belt can be used.
18) Next step is to modify the altenator plug. I grabbed (2) plugs to use the 'pins' as you have a 3 wire set up. Remove the rubber plug at the back and insert a 3rd pin from the spare plug. Re install.


Use this picture to solder the GM plug in place of the Toyota plug:
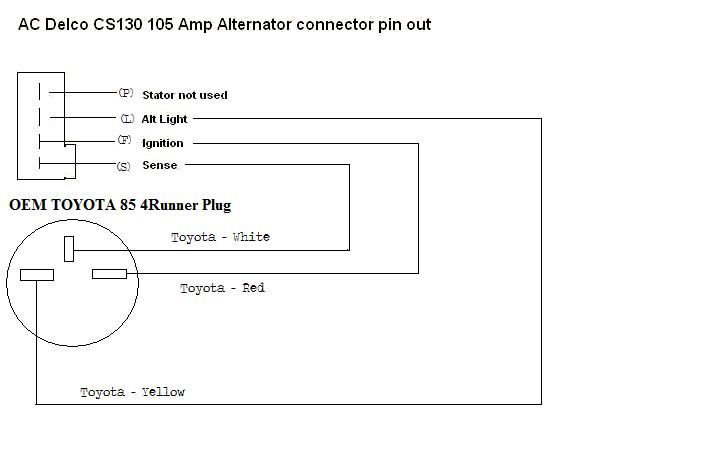
GM plug soldered:

19) Run the 8 guage wire to the positive post of the battery. Some people remove the stock power wire, i did not and have not any problems.

20) Re-install everything else in the reverse order
Some pictures of the completed project.


*Not affiliated in anyway with Trail Gear or NAPA. I assume no responsability for any damages: personal or recreational
This is not a final copy. May be some mistakes. Comments appreciated before i finalize it.
Enjoy
