|
|
Post by Hoodlum on Jun 18, 2009 8:15:49 GMT -5
You got a good woman then,mine would have told me to pound sand and to figure it out for myself.I was just wondering because I got a few old tow straps that aren't any good for recovery but the mid sections are still in tact and solid just the first few feet of each end are trashed.
|
|
|
|
Post by DeadlyPeace on Jun 21, 2009 23:35:50 GMT -5
You got a good woman then.... I was just wondering because I got a few old tow straps that aren't any good for recovery but the mid sections are still in tact and solid just the first few feet of each end are trashed. |
|
|
|
Post by DeadlyPeace on Jun 22, 2009 0:03:32 GMT -5
Well the shackle straps seem to do ok, but I did take into consideration if they do end up stretching out more while on the trail so I added an extra bolt holes to adjust the straps so they're tighter.
Yesterday I did some light work. Originally I had just one rock light up front in the engine compartment, one in back, and two in the middle (one per side). I decided to remove the one from the back and add it to the one up front, but moved them under the fender like on my DD/wheeler.
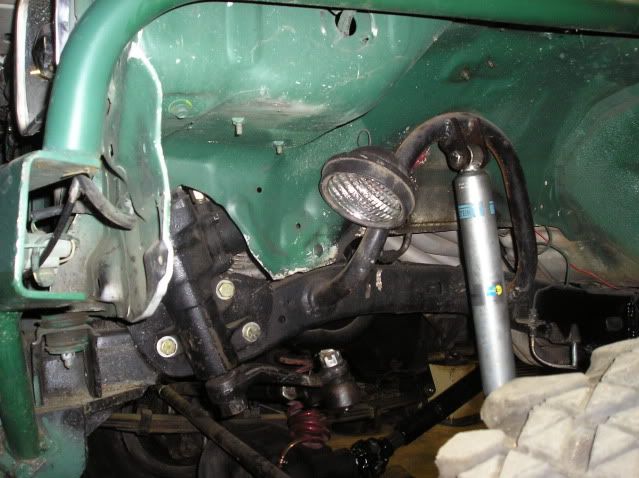
The middle ones are basically the same as they were other then I moved them out away from the frame a little for better adjustments and bolt access.
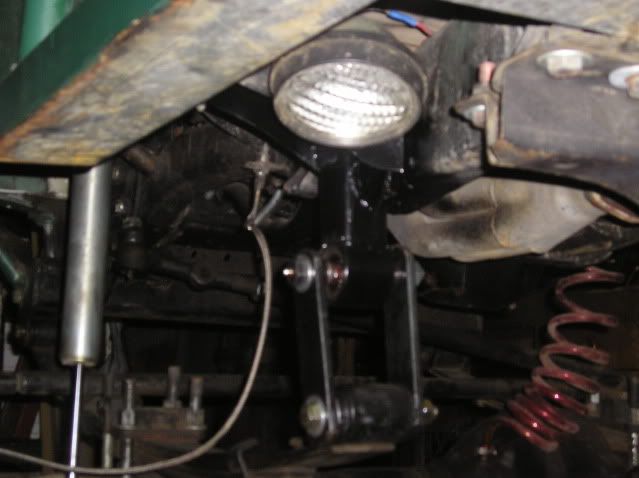
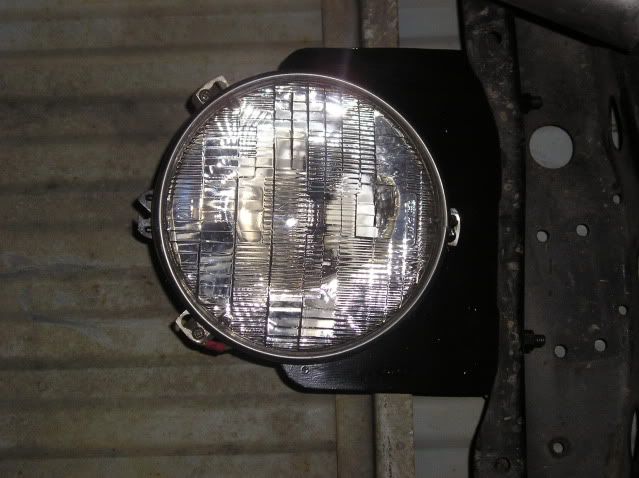
For the rear I used a round headlight that I had with a changeable H4 bulb. So I can put a brighter one in later. To mount it I just cut a half circle in a piece of 1/8” sheet metal and welded the headlight housing to it. Then bent the other end in a L shape, drilled to two holes in it and the rear cross brace. Welded a bolt in each hole on the mount and bolted it up. I may end up changing this out for two rock lights like the front and middle later on, but it's what I had on me at the time, and seems work well.
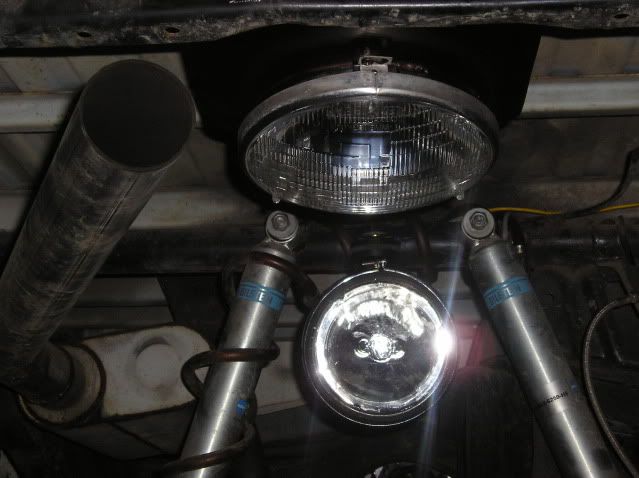
I also added on a reverse light too while I was at it. For this I made a L shape mounting tab and welded it on to the round tube cross brace between my shock and bolted up a KC Daylighter off road light. If anything I can definitely see in reverse.
|
|
|
|
Post by DeadlyPeace on Jul 15, 2009 1:57:30 GMT -5
hey man like the ride......when you do the custom flatbed on that thing is it possible for you post pics? Ive got a 95 Tacoma daily driver im wanting to build a flatbed for but dont want the workish type flatbed you see on duallies n whatnot.......i like the offroaders flatbed myself and think i can make it workout where its just as useful to me as the 1 ton flatbeds |
|
|
|
Post by DeadlyPeace on Jul 15, 2009 2:38:43 GMT -5
Welll I drew up some plans of what I had in mind during my recovering time and just picked up the metal for starting my flatbed. Unfortunately they stopped making 1/16" steel diamond plate at the place I get my steel from and the thinnest they had was 1/8". So I might end up having to make some changes from my original plans or cough up some extra $$$ and go aluminum. Unless someone knows where I can pick up some 1/16” diamond plate for a fair price in the Sacramento/Placerville, CA area. I now of a place in Winchester, Kentucky that I can get some for a lot better price then I can find here, but it will cost an arm and a leg for the shipping, which is kind of expected.
FYI: It may be a few days before the work starts.
|
|
|
|
Post by DeadlyPeace on Jul 17, 2009 3:20:31 GMT -5
Forgot to mention that last weekend I redid the rear cab corners so that they'll look a lot better.
First I cut off the 1/8" plate that was there and leveled it out better. Also pull the dent out below.
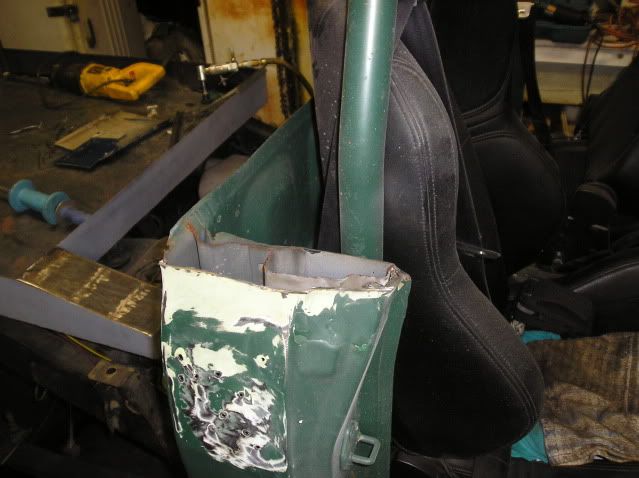
Then I took a piece from the removed section of the bobbed bed I did on Blues (my DD). I then cut it to about the right shape I needed. Folded over the inside and rear end parts of the sheet metal for a lipped edge.
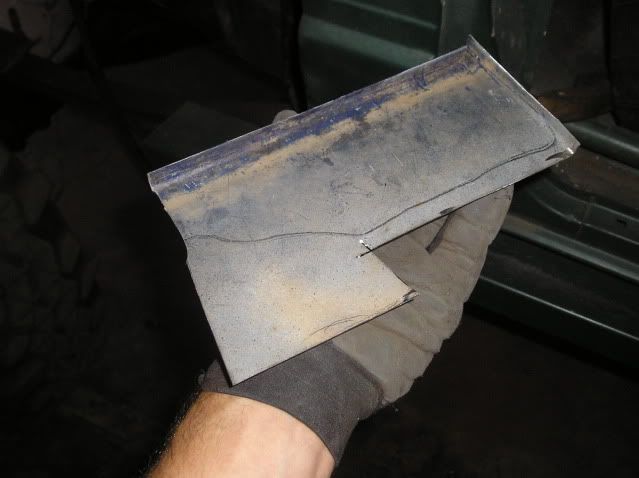
I tack welded that to the top of the cab corner and starting from the back and bent, shaped, cut, and tacked it in place as needed. The very top/side section of the of the cab corner I bent inward so that when the new sheet metal was bent down it would become flush and the weld would fill the gap. The front part was cut so that it would go flush with the curves of the door jam.

After getting the look I wanted I fully welded it. Then grinded the welds down and cleaned up the area for a little bondo.

I need to pick up some more bondo so I haven't done it yet, but wanted to get the corners done before starting on the flatbed. The back of the cab will be changed also, but that will wait till the bed is done or at least the bed rails are on.
Should be starting the flatbed this weekend
|
|
|
|
Post by DeadlyPeace on Jul 19, 2009 2:49:54 GMT -5
Today I finished up the toolbox I made a while back for this.
- Put a lip all the way around the upper edge of it.
- Made some mounting tabs for it.
- Cleaned, primered, and painted the whole thing with undercoating.
- And mounted it.
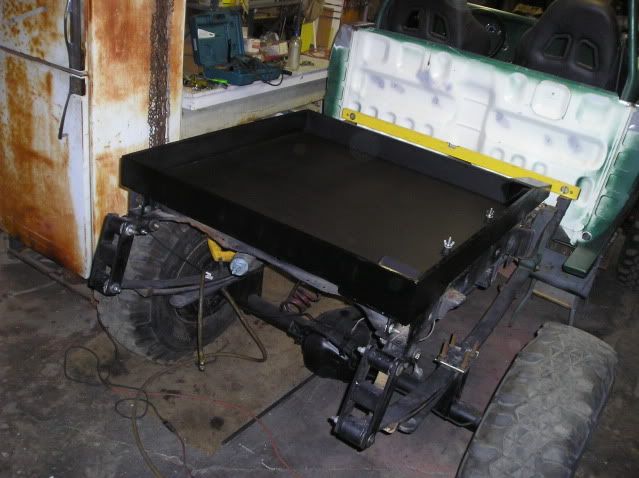
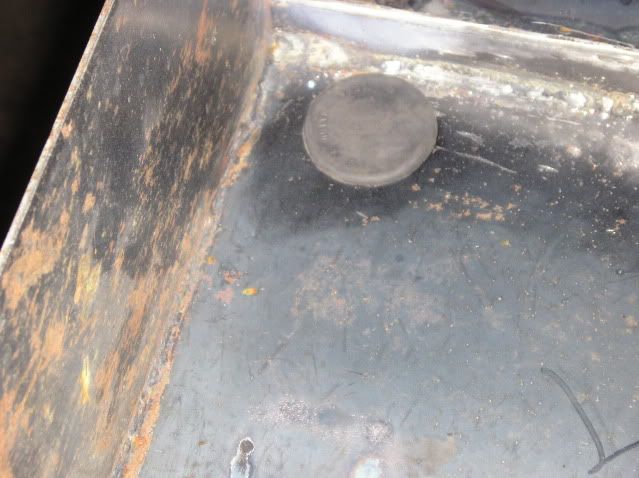
- Also added some drain plugs for cleaning it out.
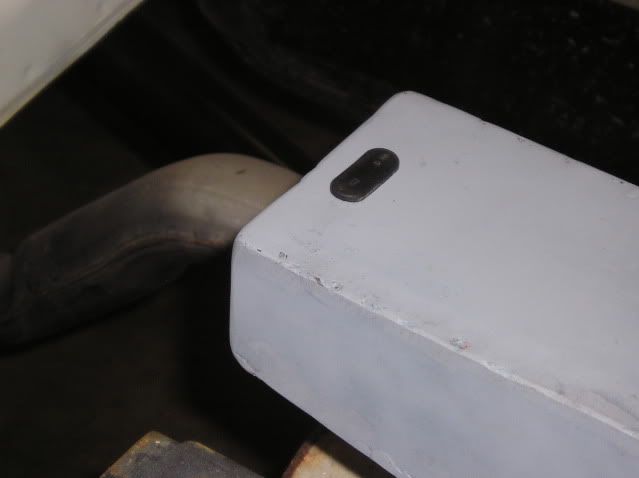
- Headed out to a friends house for a BBQ and beer.
Before putting the front two mounting bolts in I decided to swap out that headlight I put in for a rear rock light for the other KC Daylighter offroad light I had. While doing this I think I came up with another idea.
A dump bed........ 

|
|
|
|
Post by DeadlyPeace on Jul 20, 2009 4:05:54 GMT -5
|
|
|
|
Post by Hoodlum on Jul 20, 2009 14:18:17 GMT -5
This has given me the kick in the rear I've needed here lately.(seeing you getting some work done)I have been blowing off all my projects for some time now.I just got motivated this past weekend.I got my half doors half done ;D I just have to fill in some holes and cut out the speaker holes then their ready for paint. I was talking to nathanpatacoma about some ideas for a flatbed on a new project I aquired ;D And you did the one thing I declined to go with.....a dump bed.LOL We opted to just have the bedside(s) hinged and plated to use as a work bench with a vise mounted to it.It looks like you answered a couple of Q's I had about what to do for a tool box.I'm going with a modified version of what you got going on. Good stuff Deadly  |
|
|
|
Post by DeadlyPeace on Jul 20, 2009 23:57:39 GMT -5
This has given me the kick in the rear I've needed here lately.(seeing you getting some work done)I have been blowing off all my projects for some time now.I just got motivated this past weekend.  I got my half doors half done ;D
Congarts on the new project.
If you have any other ?'s or ideas you want to throw by me for it, you know how to reach me.
I'm working on an article for doing flatbeds also. So take some good pics and write down some of the important imfo, and maybe I can use it. I like the idea about the sides dropping with a vise. 
Good luck with the build.
|
|
|
|
Post by Hoodlum on Jul 21, 2009 8:20:23 GMT -5
This has given me the kick in the rear I've needed here lately.(seeing you getting some work done)I have been blowing off all my projects for some time now.I just got motivated this past weekend.  I got my half doors half done ;D
Congarts on the new project.
If you have any other ?'s or ideas you want to throw by me for it, you know how to reach me.
I'm working on an article for doing flatbeds also. So take some good pics and write down some of the important imfo, and maybe I can use it. I like the idea about the sides dropping with a vise. 
Good luck with the build.
HAHAHAHA! 1/4 doors ,I like it ;D I don't know what to do about the spare wheel but I'm sure I'll come up with something as the build gets going.I can't do much until I know what tires/wheels I'm using.. |
|
|
|
Post by DeadlyPeace on Jul 22, 2009 1:30:40 GMT -5
Spare tire? What's that?
Could mount it in the bed, or I have a design idea I did for a tire carrier off the back I could throw at you. Not sure if I'll use it on Zilla or not. The only time I needed a spare way when I take one. So I just stop taking one and haven't needed one. Maybe Zilla's Irish.
|
|
|
|
Post by DeadlyPeace on Jul 22, 2009 1:41:51 GMT -5
Well I did a little this evening.
Got the bed frame back on and the hinges bolted up.
Put a couple of the side support baces in.
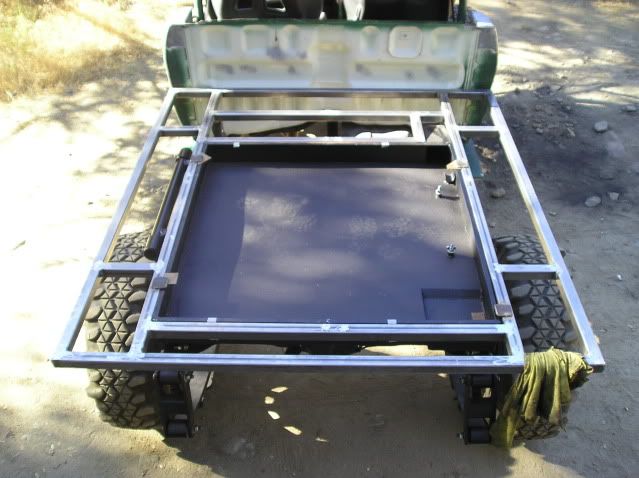
Built and tacked on the side rails. Made them out 1" x .120 wall sq tube.
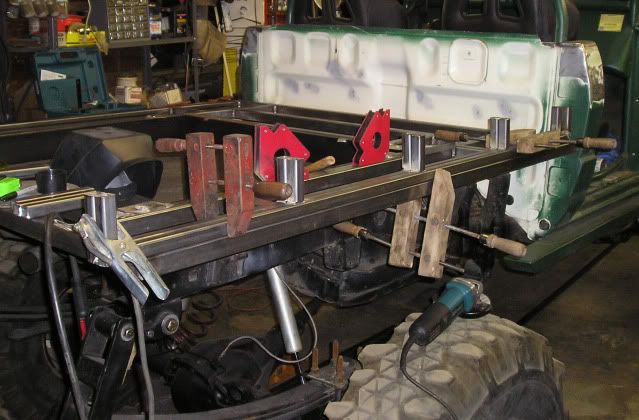
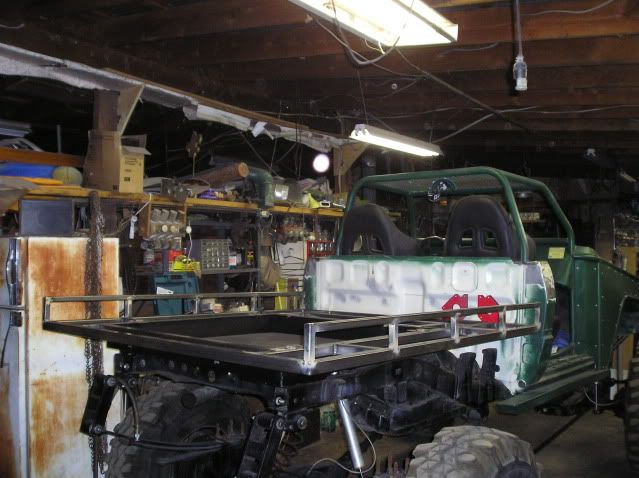
|
|
|
|
Post by DeadlyPeace on Aug 6, 2009 23:09:40 GMT -5
I guess it’s time for an update. The bed itself is finished other then adding the lower rails under the bed, the rear rail on the back, and finish painting it. The lower rails I’m going to wait on until I get the actuator for it. Leave as much weight off as I can for now while I’m using the power by arm-strong method. The rear rail I was planning on making so it could drop like a tailgate and also be removable with spring pins in each corner of it. The rail where originally going to be a little taller, but I decide to shorten them down so I’m debating if I still want to do this. Leaning towards doing it cuz the bed is a fair distance from the ground.
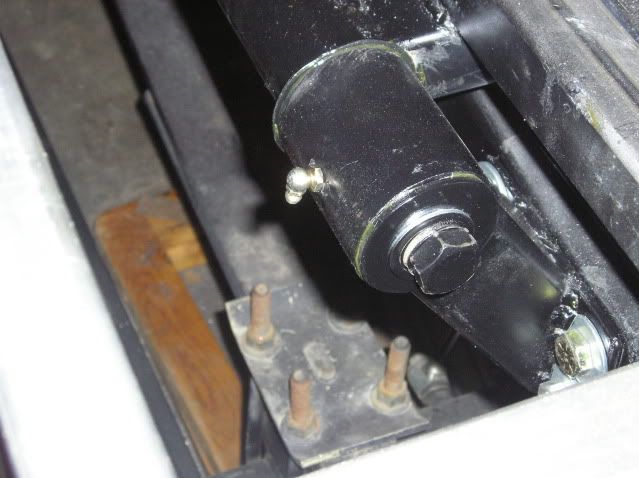
The hinge is completely finished. For both ends of the hinge I welded a nut to a 1/8” thick washer then welded the washer inside the end of the tube. At the top of the pic there’s a thin metal plate that goes around the tube. Also a rubber o-ring up next to it for a grease seal.

I then took two more 1/8” thick washers and welded them together.

Here’s a pic of one side put together.
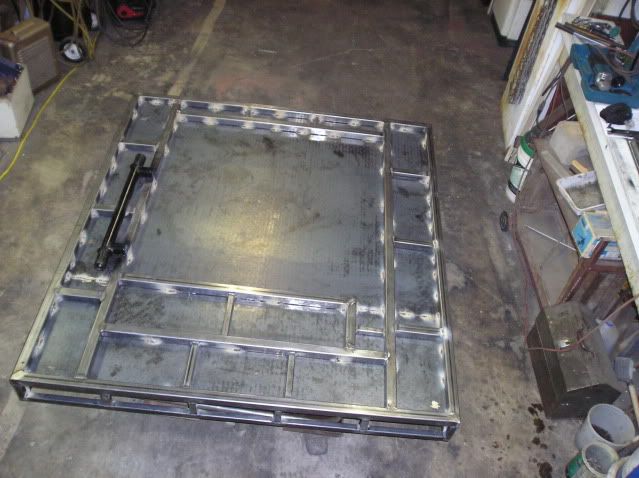
Here the bed sheeting is all welded up to the frame
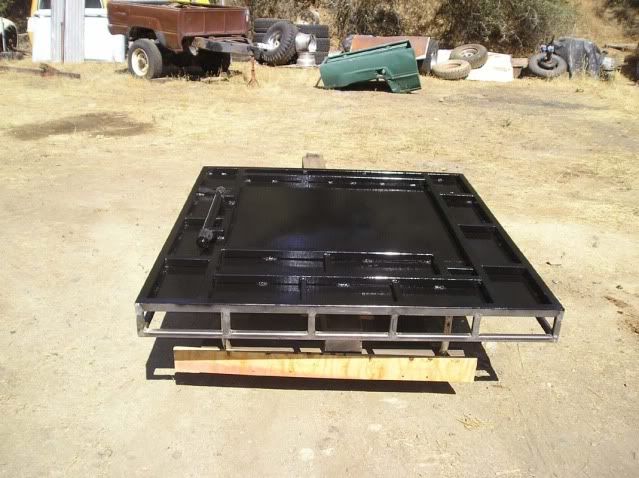
and then the bottom end painted and baking in the sun.
|
|
|
|
Post by DeadlyPeace on Aug 6, 2009 23:22:22 GMT -5
I’ve also been working on the back of the cab.
The back of the cab cut to the shape I wanted.

I then removed the top front bed rail off the old bed and formed it to the shape of the back of the cab.
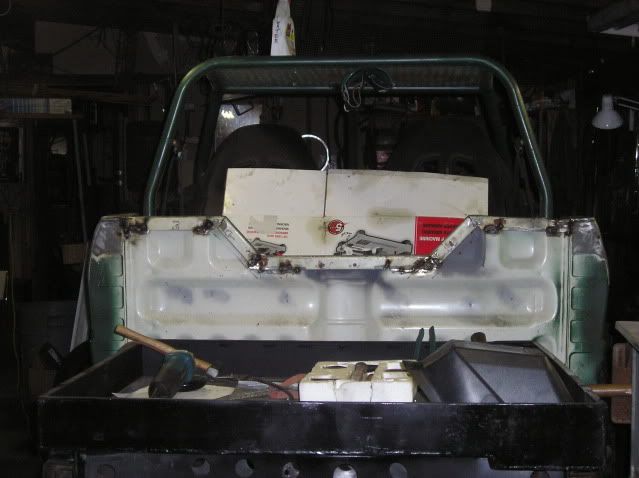
The inside. I did have to modify the top of the center hump a little.

For the back I decided to just flat plate the top. Here’s how it sits now.
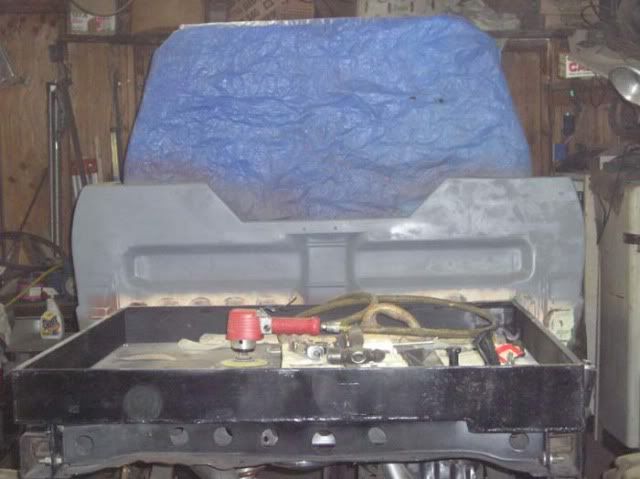
I also did the bondo work on the rear corners of the cab while I was doing the back.
|
|
|
|
Post by Justin on Aug 14, 2009 7:50:21 GMT -5
Very nice work!! That is the nicest flat bed iv seen. Also was that a set of blue prints i seen if so u don't mess around.
|
|
|
|
Post by DeadlyPeace on Aug 15, 2009 2:16:32 GMT -5
Thanks for comp. And yes that was a blue print. It's easier and quicker for me to just design it on the computer then to grab a peice of paper and a pencil.
|
|
|
|
Post by DeadlyPeace on Aug 15, 2009 2:34:19 GMT -5
Well tonight I put a couple coat of paint on the back of the cab of what (I think...) will be the final color. If you look at the front rail of the bed it's a darker green that I was thinking of, but decided to go with a lighter green instead.
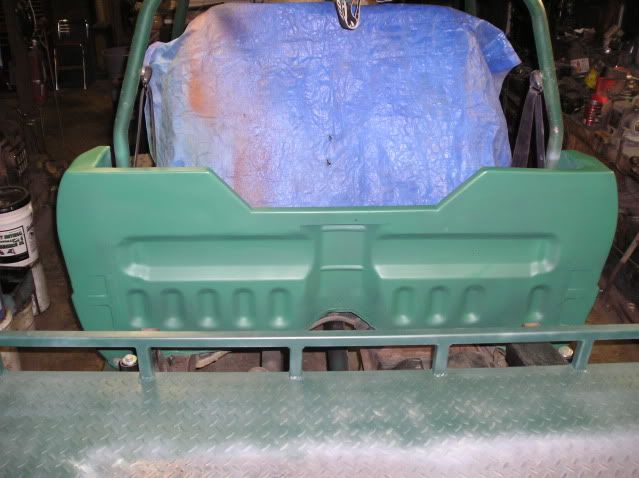
Here you can see the color it use to be (or I guess somewhat still is) vs the new color. The old green is actually a satin gloss which is what I used for the new color with some added white primer to lighten it up and get rid of the glossy look.

|
|
|
|
Post by DeadlyPeace on Aug 26, 2009 2:26:15 GMT -5
Small update. Been mainly delayed on doing much work cuz I’m waiting for some bump-stops to arrive in the mail.
I coated the diamond plate with bed liner and then painted two coats to the top of the bed. I’ll do a third coat to the whole thing after painting two coats on the front.
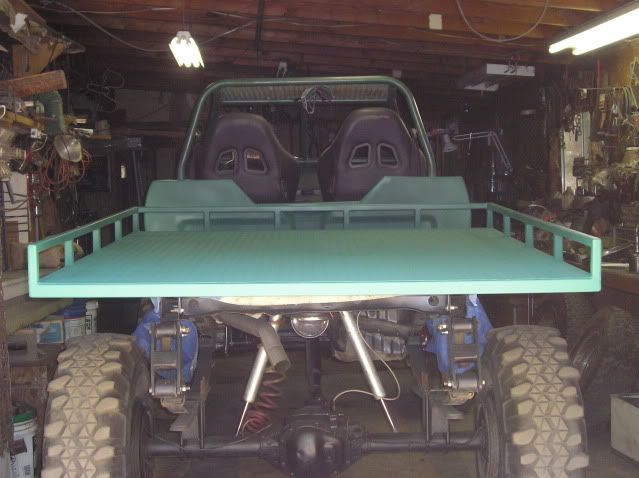
Started on making the hold down latch. I was planning on making one like you'd find on an ammo box, but ended up finding an ammo box about a month ago that looks like it got ran over and was crushed pretty bad, but the latch was still in fair shape. I drilled out the spot welds on the front plate on the ammo box and then spot welded it into place on the truck frame.
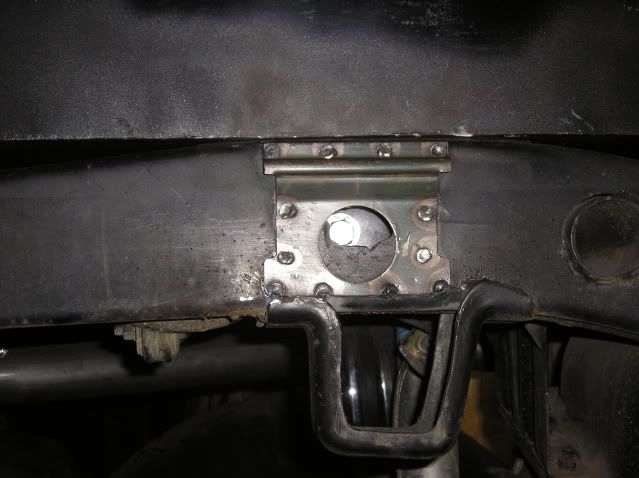
I then removed the rod that bends through the latch and the lid (I’ll need to make it longer so it wouldn’t work). Then I bent a piece of sheet metal around the new rod I got so it was a U shape with a flat area that I drilled some holes in for spot welding to the bottom of the bed.
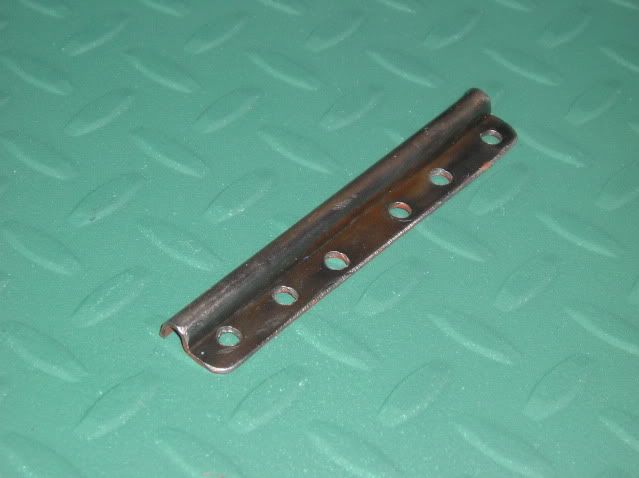
Now I just need the bump-stops so I can finish my bed mounts. Then I’ll be able to have the bed at full rest position to finish the hold down latch. I could just finish the latch now, but doing it after the bed mounts I’ll be able to make sure the latch won't be too loose or too tight.
For the bed mounts so for I had some extra 3” body lift spacers that I cold welded a 1/2” bolt into one end and the other end I’ll cold weld a nut for the mounting the bump-stop. For the bolt I ground the head down so that it was a little bigger then the hole then drilled the all, but 1” of the hole to size of the head. Put some cold weld on the bolt and slipped down in the hole and put some cold weld over the top of the head too.
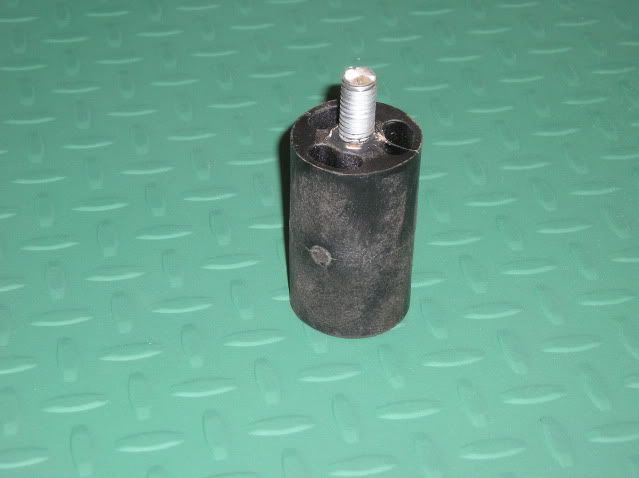
Hopefully within the week I should get the bump stops then I can finish the bed other then adding the lower rails under the bed which as I mentioned above that I’m waiting till I get the actuator for it. Although I have been thinking about making them removable, or at least the left side for making it easier to work on the hinge when needed.
I might start on the rear rail tomorrow or the next day.
|
|
|
|
Post by Hoodlum on Aug 26, 2009 8:16:38 GMT -5
Insane man! I like how you scavange parts to get things done bro! Your like that Macgiver(spelling?) dude from back in the 80's  |
|