|
|
Post by Mike Kelly on Jan 18, 2010 20:58:52 GMT -5
OMG - Deadly, that is amazing! I really have no words for this... Thanks? Doesn't seem like enough, but THANKS! You did a great job on it. Looks fantasic. I'm proud to have OUR site name on your ride. WELL DONE  |
|
|
|
Post by DeadlyPeace on Jan 18, 2010 23:32:14 GMT -5
Well I'm glad you like it. And to make it easiers... Thanks is enough ;D
I figure it's like putting one of the windshield stickers on except just harder to remove and besides I didn't have a windshield to put one on ;D
|
|
|
|
Post by Hoodlum on Jan 19, 2010 9:28:58 GMT -5
That's one of a kind right there.Good thought and well executed.Deadly you are one creative mofo bro!  |
|
|
|
Post by DeadlyPeace on Jan 19, 2010 15:07:25 GMT -5
Thanks
|
|
|
|
Post by DeadlyPeace on Jan 30, 2010 0:13:37 GMT -5
A few up date pics. Decided to start the weekend early and started working on the lower rail for the flatbed.
The basic shape of the rear.

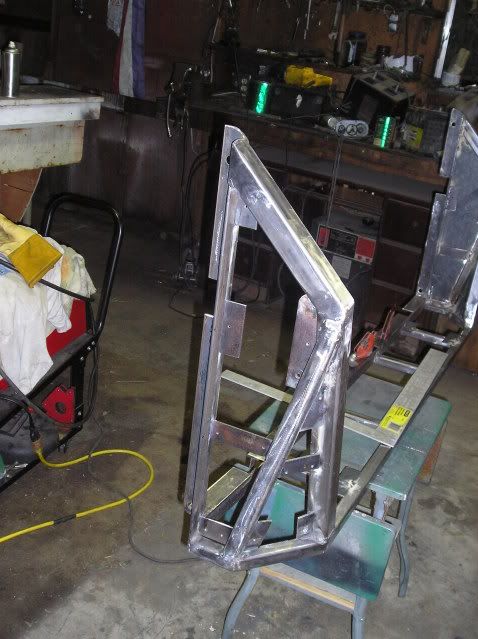
Mocking up the corner. I used the magnets to hold the pieces in place instead of tack welding them on so it would come apart easy for using them for patterns for the other side.

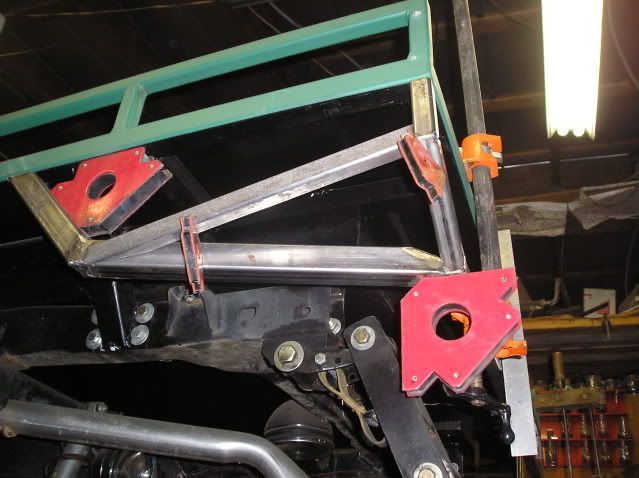
I cut a triangle section out of both side of the end of the 1 1/2" tube to slope the top of it down to where it runs into the 1” tube.
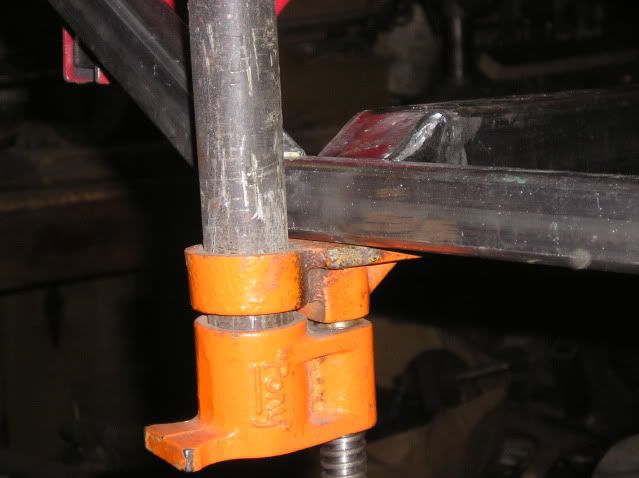
This weekend I'll do the other corner and the rest of the rear. Then fully weld it up and moving on to the lower rails in front of the tires and then sheeting it if I have enough time.
|
|
|
|
Post by DeadlyPeace on Feb 1, 2010 0:39:08 GMT -5
Rear section fully welded, but just tacked at each corner to the bed. I do still need to make a small mod to the left side 1 1/2" corner tube for when the bed lifts up. Also thinking about making the lower rails removable, but not fully sure on that yet.
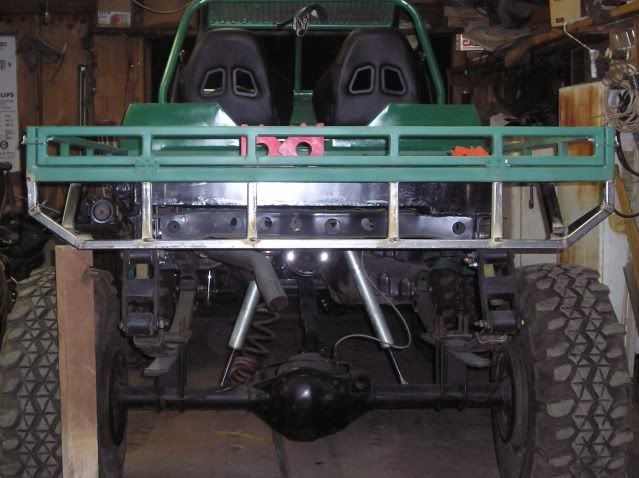

Got all the pieces cut for the front sections, but debating on how I want to do the front end of it. The lower corner of the 1 1/2" tube sticks out past the body. After running different Ideas through my head I decided on a simple solution that won’t take away from the strength of it. I’m going to just cut a triangle section (red dotted line) out of the bottom of the tube and then bend the side of it in to match the bodyline.
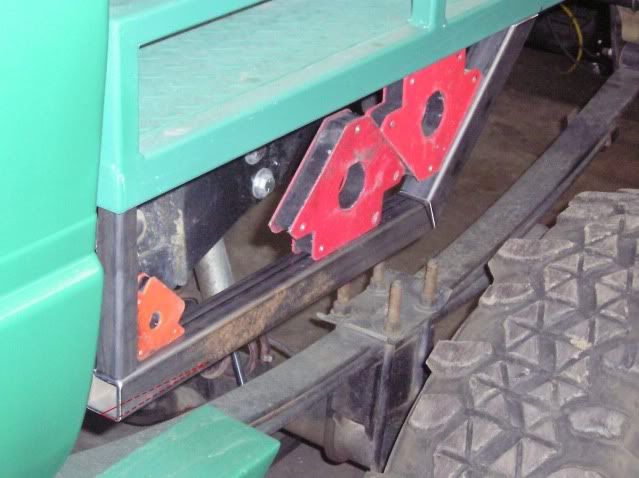
|
|
|
|
Post by DeadlyPeace on Feb 23, 2010 5:00:47 GMT -5
Got all the lower railing 99.9% done.
Here's a couple pics of the finished front section. Just needs a little more smoothing and cleaning up.
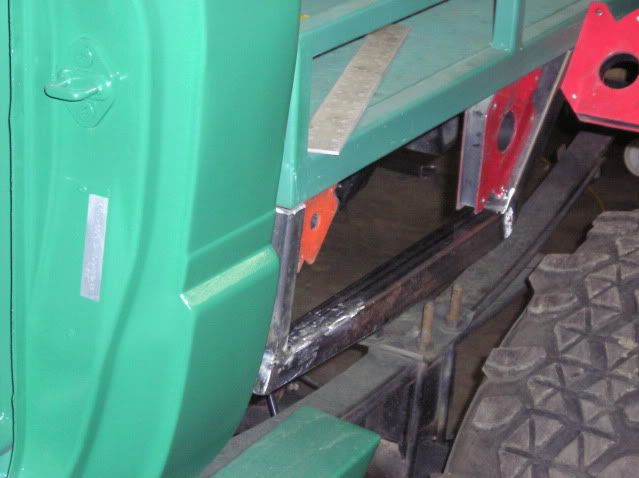

I did decide to go ahead a make the lower rails removable. For this welded some 3/16" x 1 1/2" anlge to the top of the rails so that they would wrap from the bottom to the inside of the bed frame. I also made the front of the rear rail section so that it was 1/16" out of square per side so that when it was put into place it would stay there without having to hold it up while unbolting it.
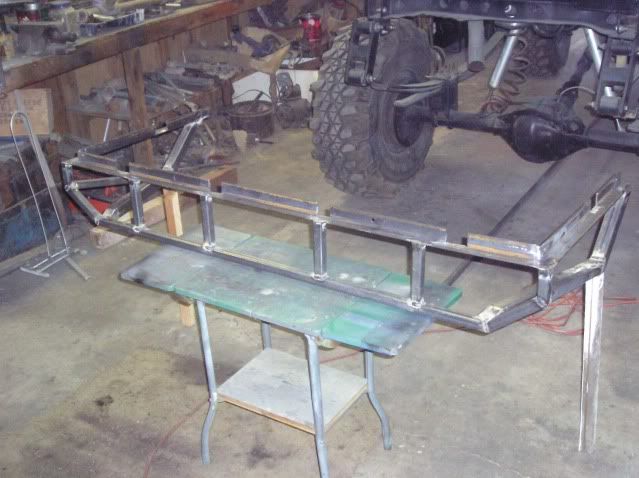
The front section I made about 1/8" out of square.
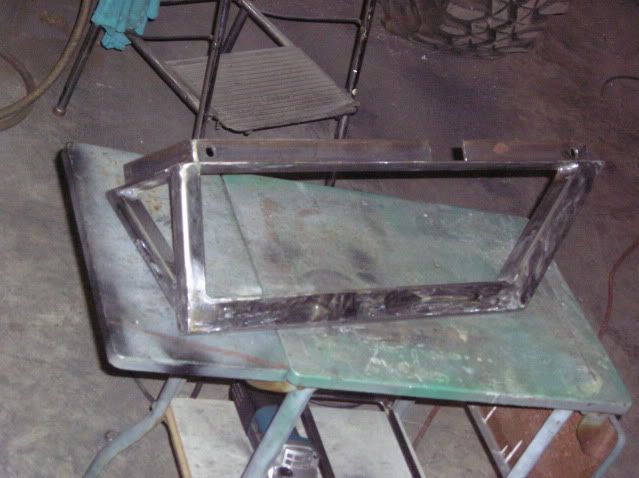
For bolting it all up I use some 7/16" coupler nuts that I inserted into the bed frame.
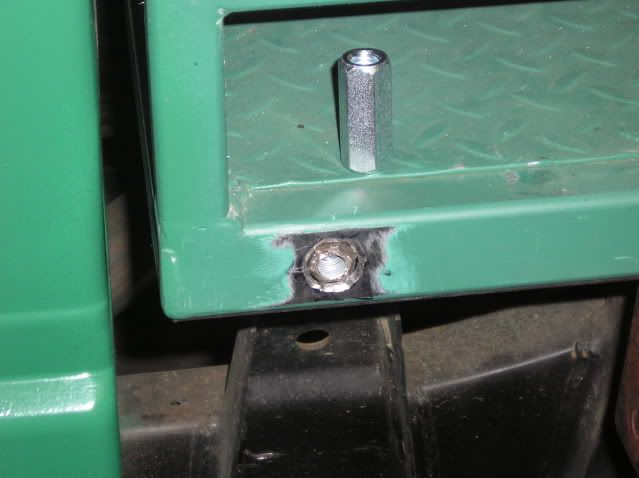
After the nuts were in and welded up I put a little cold-weld into the end of them to seal them up on the outside.

My hole jig to drill all the pilot holes in the middle of the bed frame.

Tabs for attaching the panels to.
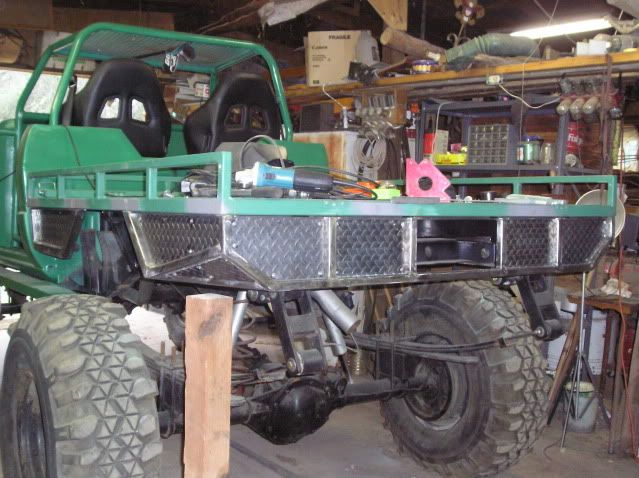
Panels installed.



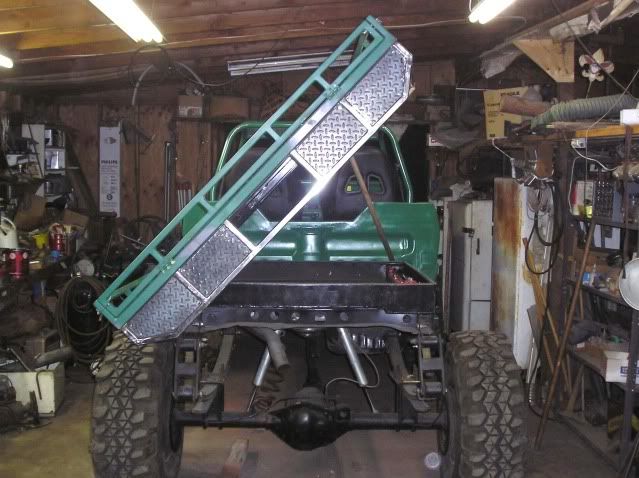
I mentioned in an earlier post that I needed to modify part of the left corner for when the bed was lifted up. It turns out that I was wrong, it wasn't as bad as I thought it was going to be. The corner was only making contact with a 1/4" of the top of the shackle so I just lowered the resting point of the shackle 3/8" and now the bed clears it just fine.
Here the bed doesn't quite clear the shackle.
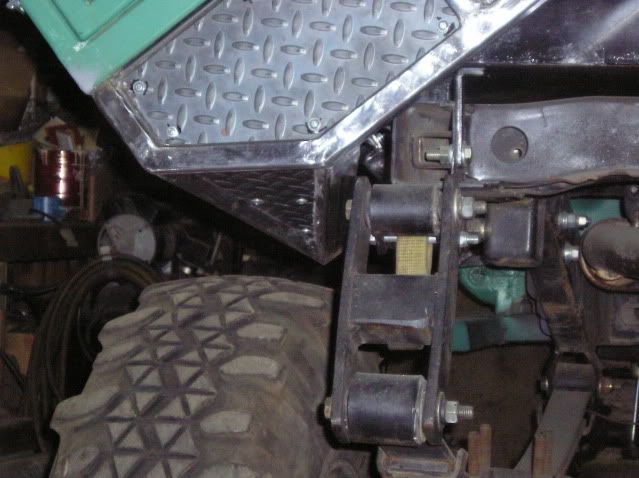
Here it is clearing the shackle.
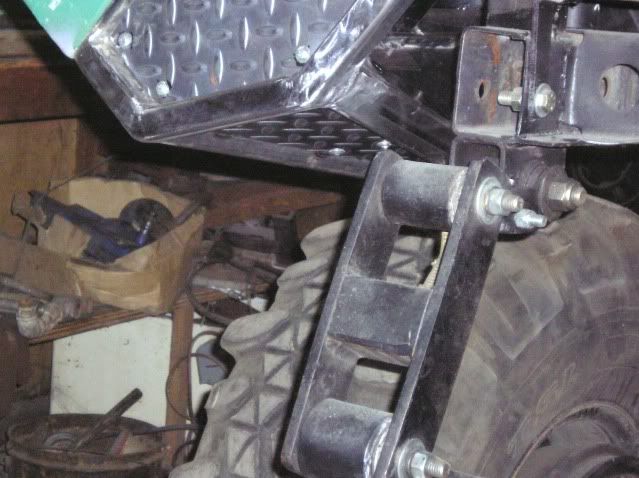
Here's a side view where I added a temporary piece of 3/8" flat bar to the spring hanger to lower the shackle. It has a piece cut to size and welded into place now at both shackles.
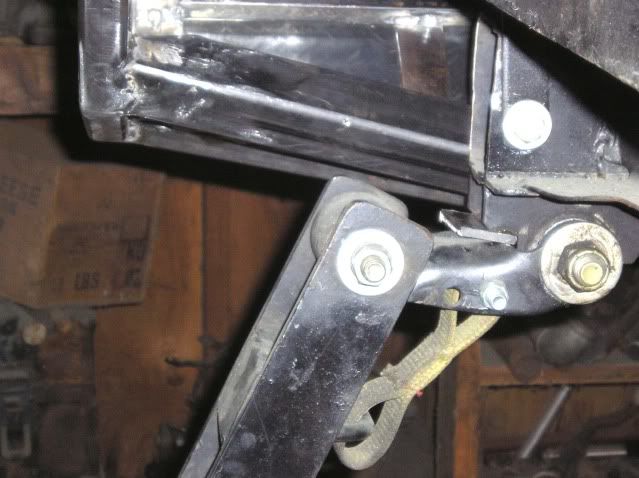
All that's left is:
Lighting
Finishing the center plate (part of if it is at the fab shop being cut)
Painting
|
|
|
|
Post by DeadlyPeace on Mar 3, 2010 0:50:25 GMT -5
Bed and lower rails are all painted now. Center plate is all finished other then the piece that's still at the fab shop. Lights should be here tomorrow.
|
|
|
|
Post by DeadlyPeace on Mar 25, 2010 2:19:54 GMT -5
Up date time.
Lighting plate assembly. Just missing the faceplate (was at the fab shop at this time) and the red plexiglas. The two sections shown are made to bolt together with countersunk bolts so that the faceplate is flush against the front of it. The U shaped piece holds the bulb in the back of the assembly.

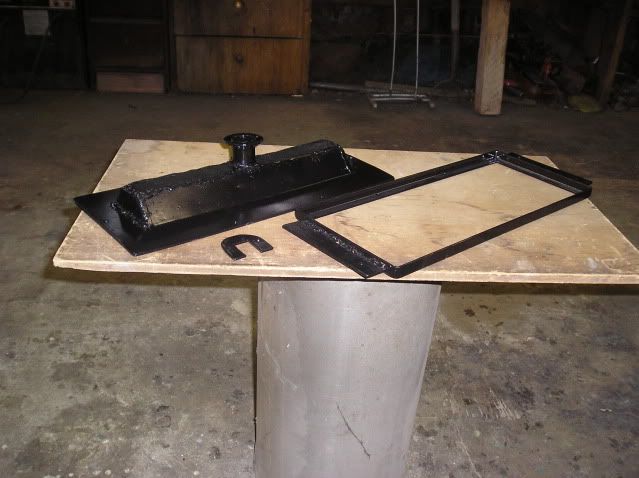
The wiring. Since the lower rails are removable I used a 4-way connecter that I can disconnect for removal. Plus while hauling it will plug into my trailer lights so that the lights will work on Zilla along with the trailer.


Brake/parking and reverse lights mounted.
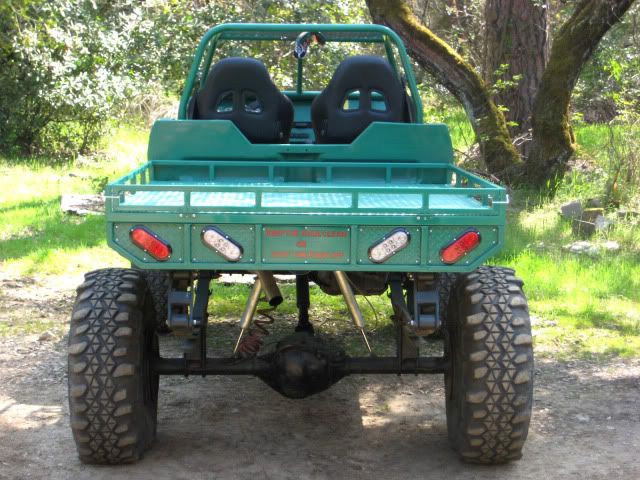
Lighting plate finished.

Lit up for night viewing.
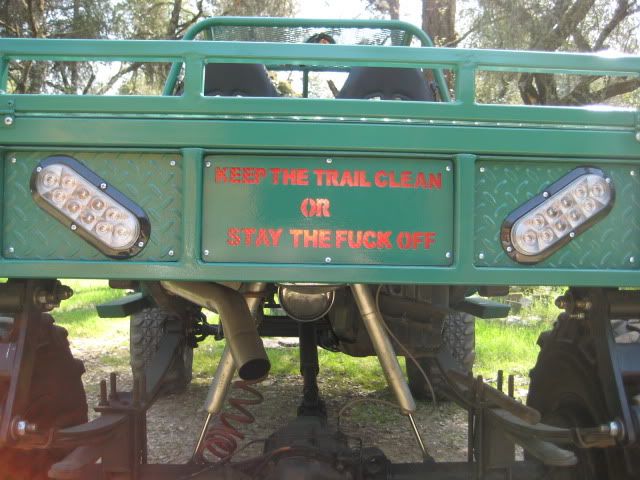
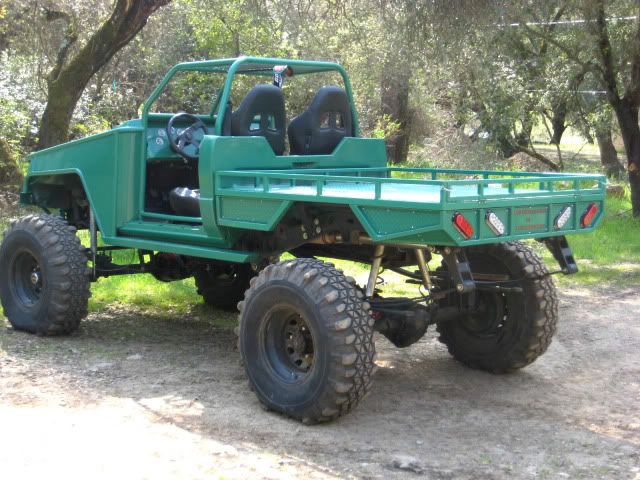
Rear corner view of the bed finished.
My new warning sticker for my dash.

|
|
|
|
Post by Mike Kelly on Apr 6, 2010 10:58:21 GMT -5
Awesome job DP! It gets better-and-better with every update! I love the fresh ideas.
|
|
|
|
Post by DeadlyPeace on Apr 10, 2010 1:28:02 GMT -5
Thanks for the comp Mike.
|
|
|
|
Post by DeadlyPeace on Jun 16, 2010 2:06:28 GMT -5
Forgot all about posting this, but I ended up painting the lettering and the flames on the gille about a month ago. I decide not to do the pin striping around them like I originally had planned cuz I thought it stood out real well without doing it.

I also cut a 6" hole next to each headlight and welded the same round hole mesh behind them that I used behind the center section of the gille. I did this to allow more air flow through the engine compartment to remove the built up heat better. I also cut some holes in the upper part of the firewall for the heat to travel out.
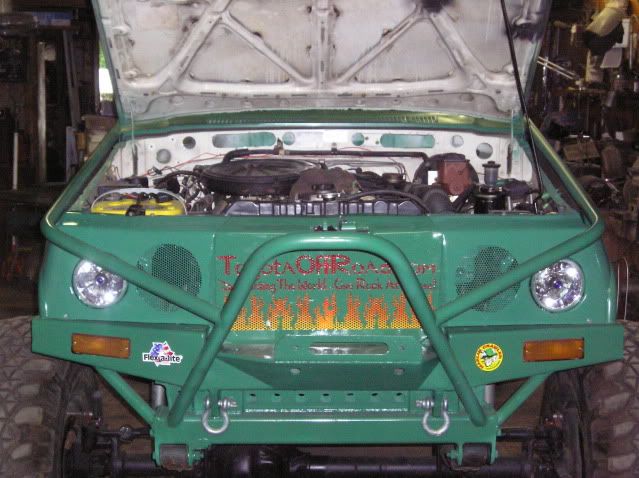
|
|
|
|
Post by Mike Kelly on Jun 29, 2010 21:27:21 GMT -5
I love the color on the logo! Fantastic!
I'm proud to have our site name on your awesome rig!
|
|
|
|
Post by DeadlyPeace on Jul 6, 2010 19:38:44 GMT -5
Thanks for the comp Mike.
I'm proud to have it on there. Just hope I never decide I need to put a winch back on the bumper.
|
|
|
|
Post by Hoodlum on Dec 3, 2010 16:42:48 GMT -5
WOW Deadly that came out nice! I had something in mind when I started my old 81.But you my friend are on a much higher level of imagination turned into reality.  |
|
|
|
Post by DeadlyPeace on Dec 15, 2010 4:32:23 GMT -5
Thanks for the comp Hoodlum. It’s been one hell of a fun project to do. I do seem to have a problem with keeping my imaginations in my head, but it always seems to be nicer to see them in reality. Well some of them anyway ;D 
Well not much has changed with it other then I added a dual t-case to it and now my gear ratios are as follows:
Axles = 5.38:1
T-case = 4.7:1
Dual case = 4.7:1
1st gear = 3.928:1 = 466.82:1 overall
2nd gear = 2.333:1 = 277.26:1 overall
Reverse gear = 4.743:1 = 536.68:1 overall
Do have plans for change the rear suspension, but won't get to that until about February.
|
|
|
|
Post by Hoodlum on Dec 17, 2010 1:21:11 GMT -5
How do you like running double 4.7's?
I thought of doing the same. But no one in our area is running them so no first hand info for the set-up.
|
|
|
|
Post by DeadlyPeace on Dec 19, 2010 5:21:16 GMT -5
If you like going reeeeally slooooow then it works out great ;D
On my DD with the stock t-case and a 4.7 dual case the ratio is about 223:1 overall in 1st gear and crawls real slow and works great.
Zilla with the dual 4.7 t-cases is insane, especially with lockers in both axles. It goes more places then my DD and in the places that I have to get a little aggressive with the DD, Zilla will climb with just feathering the gas where as before in the same places I had to get a little bit on the gas or a higher gear with a slight run at the obstacle. I like it and will definitely be doing it again on my next rig.
|
|
|
|
Post by bama4runner on Feb 5, 2011 12:25:41 GMT -5
I really like your fab work on the body. Looks clean and sanitary. Nice work man.
|
|
|
|
Post by robmxer on Dec 30, 2012 13:45:54 GMT -5
Read over the past 5 pages quickly, this is quite the rig! Awesome to see how much time and energy you put into it. Looks like a sick ride!
|
|